
In this article, you will learn how to securely wipe your old hard drives before getting rid of them.
Table of Contents
Introduction
If you are like me you probably have a good amount of old hard drives taking up space and collecting dust. You may also ask yourself how to securely erase the data before getting rid of them. I recently took the time and gathered all my old hard drives to wipe them. In this process, I learned how to securely wipe all data. This article condenses my research into an easy-to-follow step-by-step guide. If you’d rather watch a video than read an article, feel free to check out my YouTube video.
Link: https://www.youtube.com/watch?v=pjRAzWngTpI
Disclaimer: The methods shown in this video are capable of erasing data to the point where recovering them would need specialized equipment. That being said, highly specialized equipment may still be able to recover your files partially. If you need to ensure that the data is permanently gone, physically destroying the drives is the only possibility.
Linux
To securely erase a drive in Linux all you need is a command line tool called “shred”. Shred uses the Gutmann method to securely erase all data on a storage medium by overwriting the existing data with random sequences of data.
Shred
- Make sure that the drive you want to erase is unmounted
- You can check the status of your device with the command “df“. If you can see the partitions of your storage medium you need to unmount them. Partitions can be identified by the number at the end. While “sdb” is the storage device itself, “sdb1” is the first partition on it
- To unmount, use the command “umount“, followed by each partition that is mounted
> df
> umount /your/device
Once all partitions are unmounted you can use shred to start the deletion process.
> sudo shred -vf -n 3 /your/device


-v: makes the output verbose, so you can see what is happening
-f: forces the overwriting process
-n: number of passes
-z: (Optional) appends a zero-pass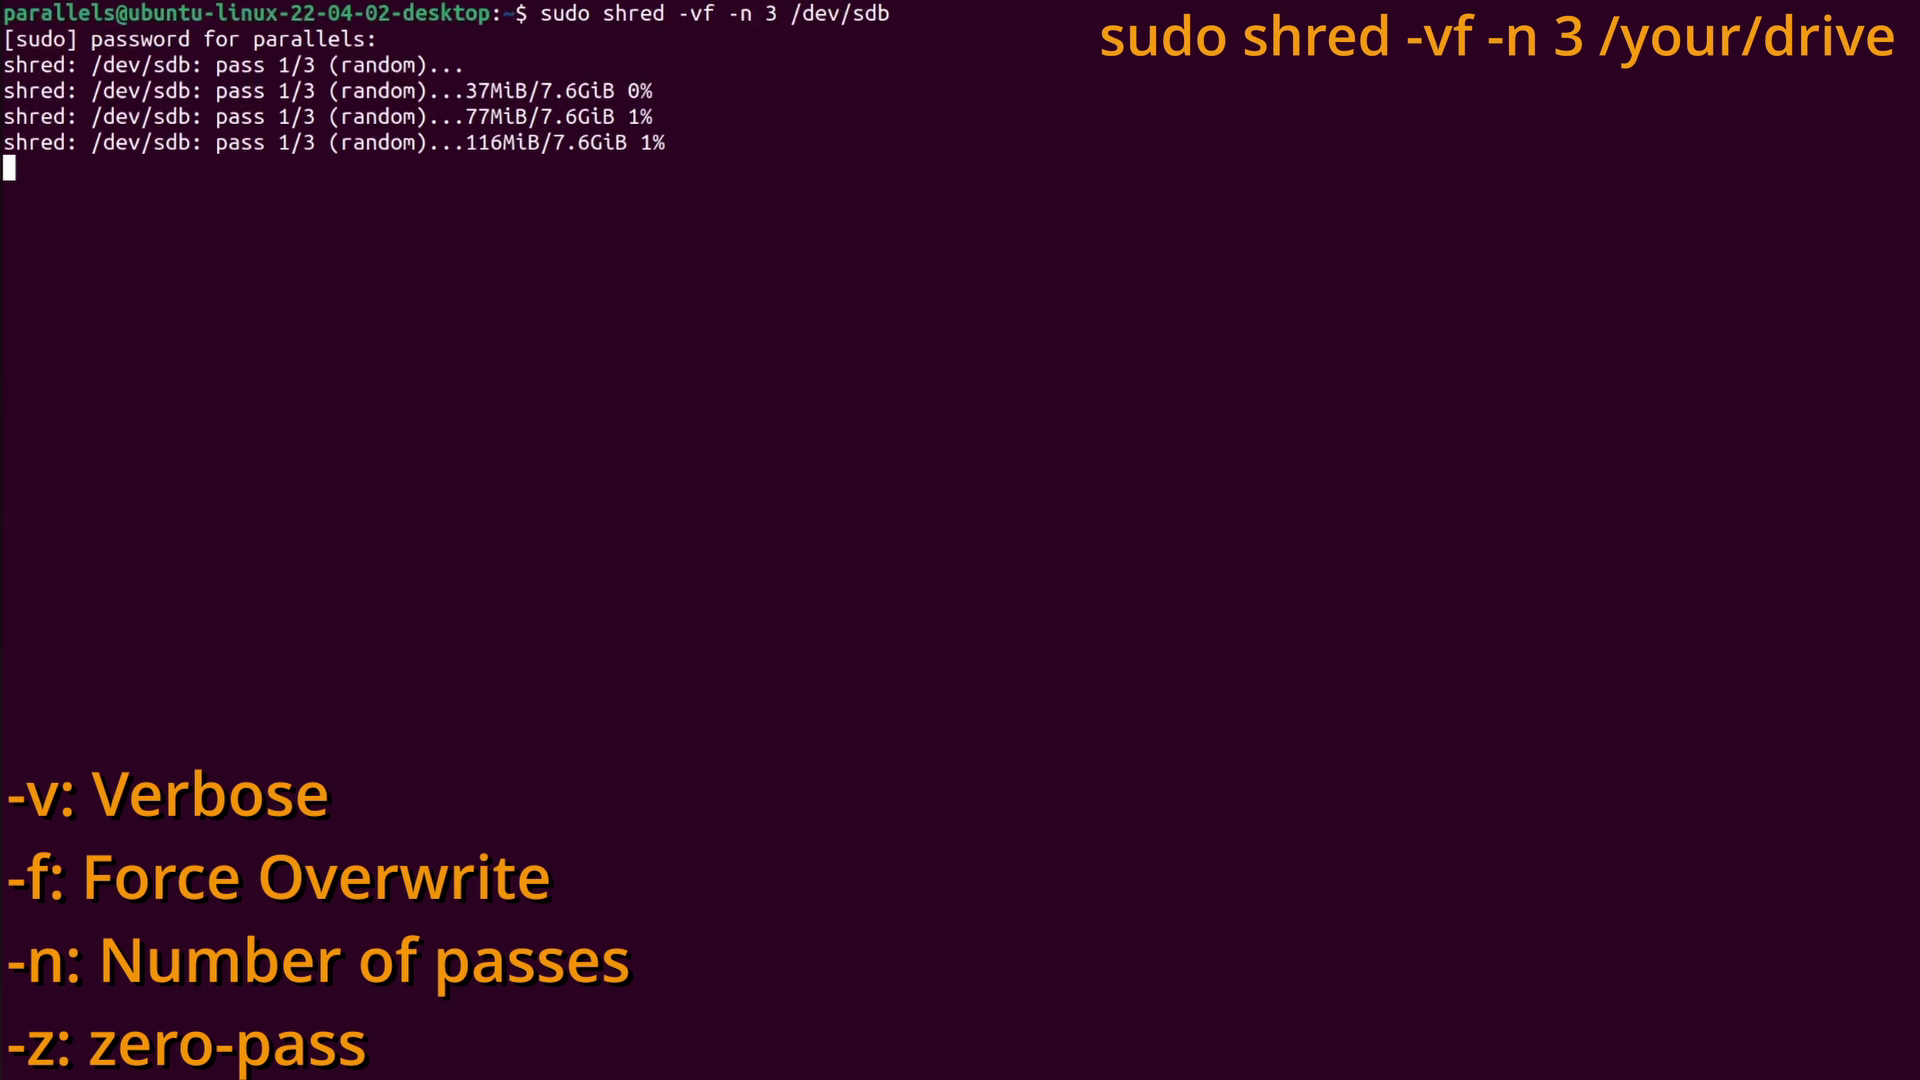
Windows
There are two ways to wipe your data in Windows.
Windows has a built-in tool called “diskpart”, which can overwrite your data with a zero-pass. If you need a more secure method of deletion, you can use a program called “Eraser“.
Eraser: https://eraser.heidi.ie/
Diskpart
- Open a command line, enter “diskpart” and confirm the admin prompt
- Type “list disk” to see all connected drives, followed by “select disk” and the corresponding number of the drive you want to wipe
- Use the “clean all” command to erase your data with a zero-pass
> diskpart     <-- (admin prompt)
> list disk
> select disk X
> clean all
Eraser
- Open Eraser and create a new schedule
- Use the “add data” button to select your storage device and the erasure method
- Confirm your choices and right-click on the new entry. Select “run now” to start the deletion process
In some cases, “Eraser” seems to have an issue accessing your drive. If that is the case for you, close the program and also close the running instance in the system tray. This is important. Now re-open “Eraser” with admin privileges.

MacOS
MacOS has a built-in command line tool called “diskutil“, which can securely erase your storage medium with four different algorithms.
Diskutil
- Open a MacOS terminal with Spotlight and type “diskutil list” to see all connected storage devices
- Use “diskutil unmountDisk” followed by your storage medium to unmount all partitions
- Type “diskutil secureErase” to see all available algorithms
- “diskutil secureErase” followed by the number of the algorithm and your drive will start the deletion process
> diskutil list
> diskutil unmountDisk /your/drive
> diskutil secureErase
> diskutil secureErase X /your/drive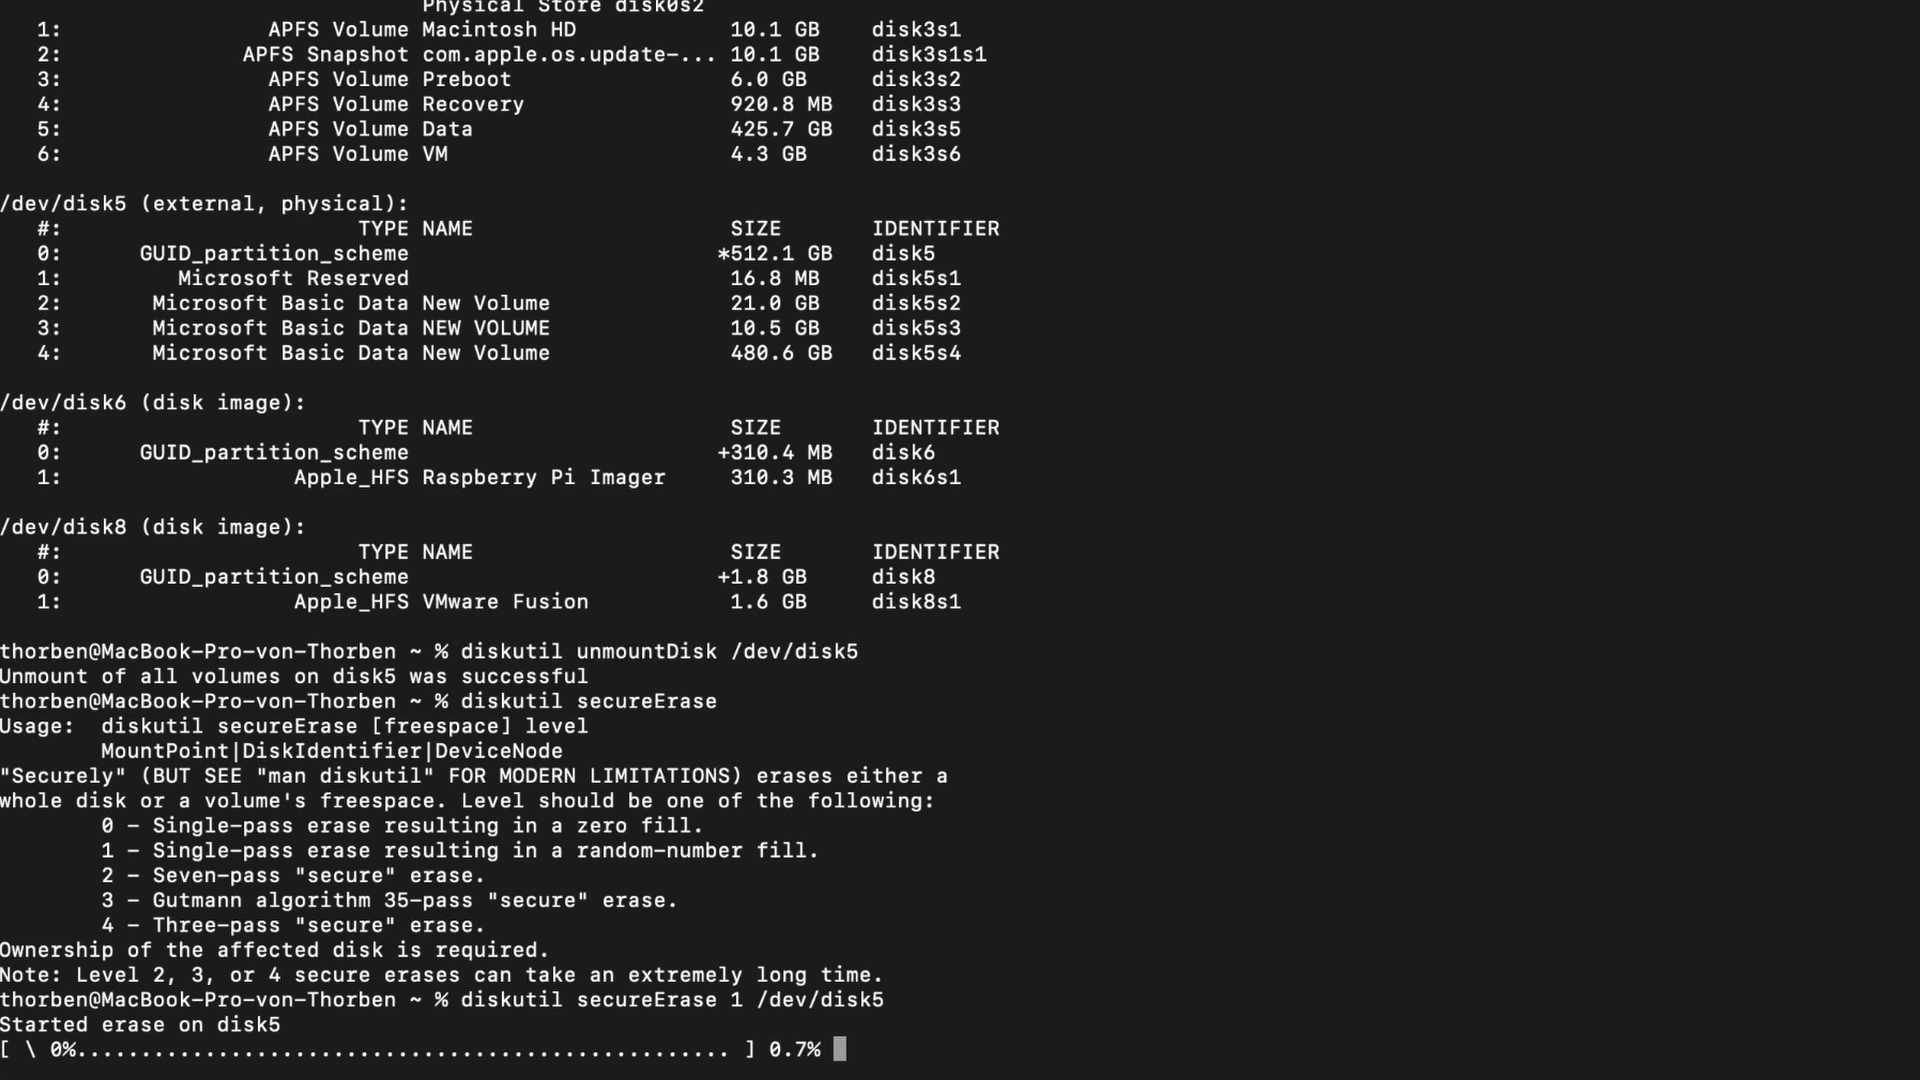
Bootable USB Environment
If you prefer to wipe your drives with a bootable USB environment, Darik’s Boot and Nuke, short DBAN, may be an option for you.
Download: https://dban.org/
Darik’s Boot and Nuke (DBAN)
- Download the DBAN ISO image and flash it onto a USB stick of your choice
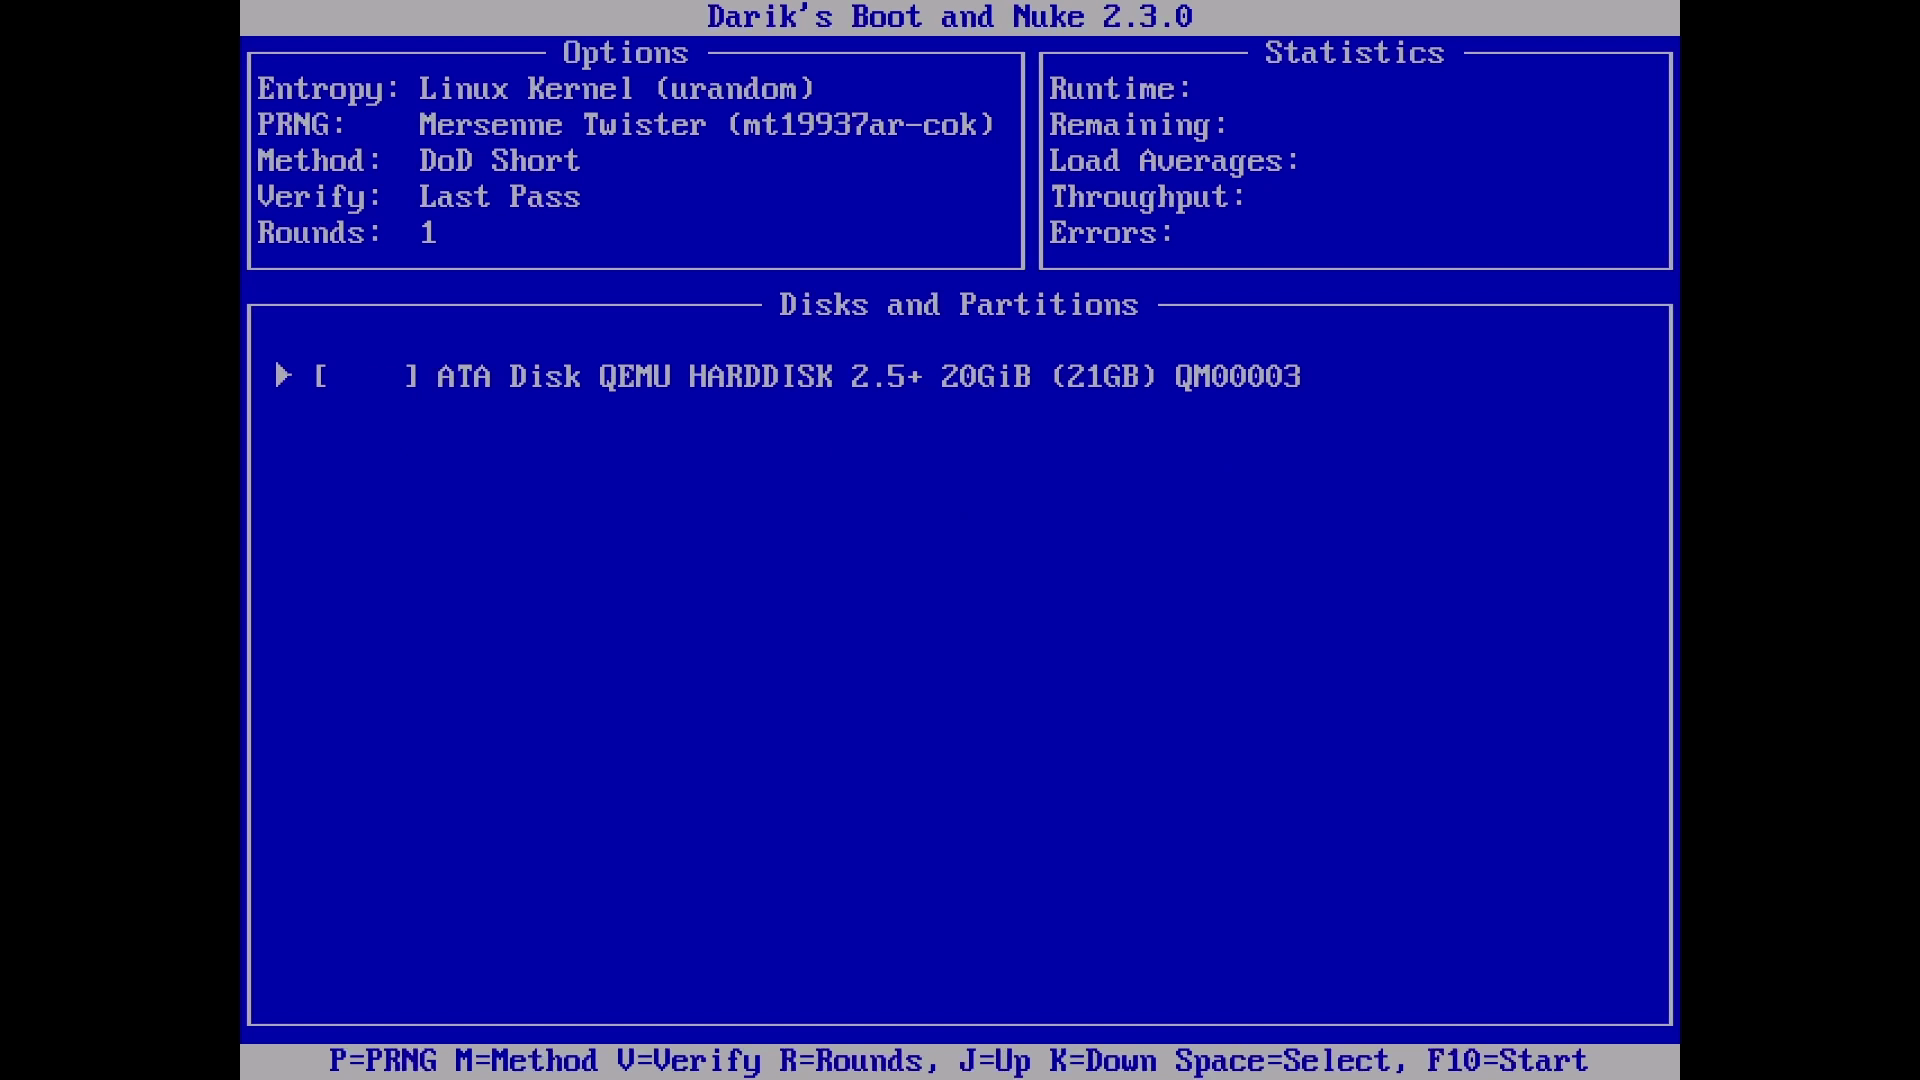
- Boot from the USB stick, wait for it to load, and select the drive you want to wipe
- The bar at the bottom of your screen shows all available configuration options
- (M) Methods
- (Space) Select
- (V) Verify
- (P) PRNG (Pseudo Random Number Generator)
- The bar at the bottom of your screen shows all available configuration options
- You can start the wiping process with F10
Additional resources
Data erasure algorithms: https://en.wikipedia.org/wiki/Data_erasure
List of data erasing software: https://en.wikipedia.org/wiki/List_of_data-erasing_software