

This article will give you an overview of how you can capture network data from an iOS device with a MacBook.
Table of Contents
Prerequisites
- iOS device
- MacBook with Xcode installed
If you do not have Xcode installed, you can download the latest version from Apple’s website or the App Store.
Setup
- Connect your iOS device to your MacBook
- Find the UDID of your iOS device
> xcrun xctrace list devices

== Devices ==
MacBook Pro von Thorben (*****-*****)
Apple Watch von Thorben (11.0) (*****-*****)
iPhone von Thorben (18.0) (*****-*****) <-- UDID- Start the Remote Virtual Interface and supply the UDID of your iOS device
- -s: Start the interface
- -x: Stop the interface
> rvictl -s *****-*****

Starting device *****-***** [SUCCEEDED] with interface rvi0
You are now ready to capture network traffic!
Capture traffic
- Start capturing network traffic with tcpdump
- -i: The interface to use
- -w: The name and location of the output file
> sudo tcpdump -i rvi0 -w nw_capture.pcap

tcpdump: listening on rvi0, link-type PKTAP (Apple DLT_PKTAP), snapshot length 524288 bytes
^C <-- Control + C
2562 packets captured
2562 packets received by filter
0 packets dropped by kernel
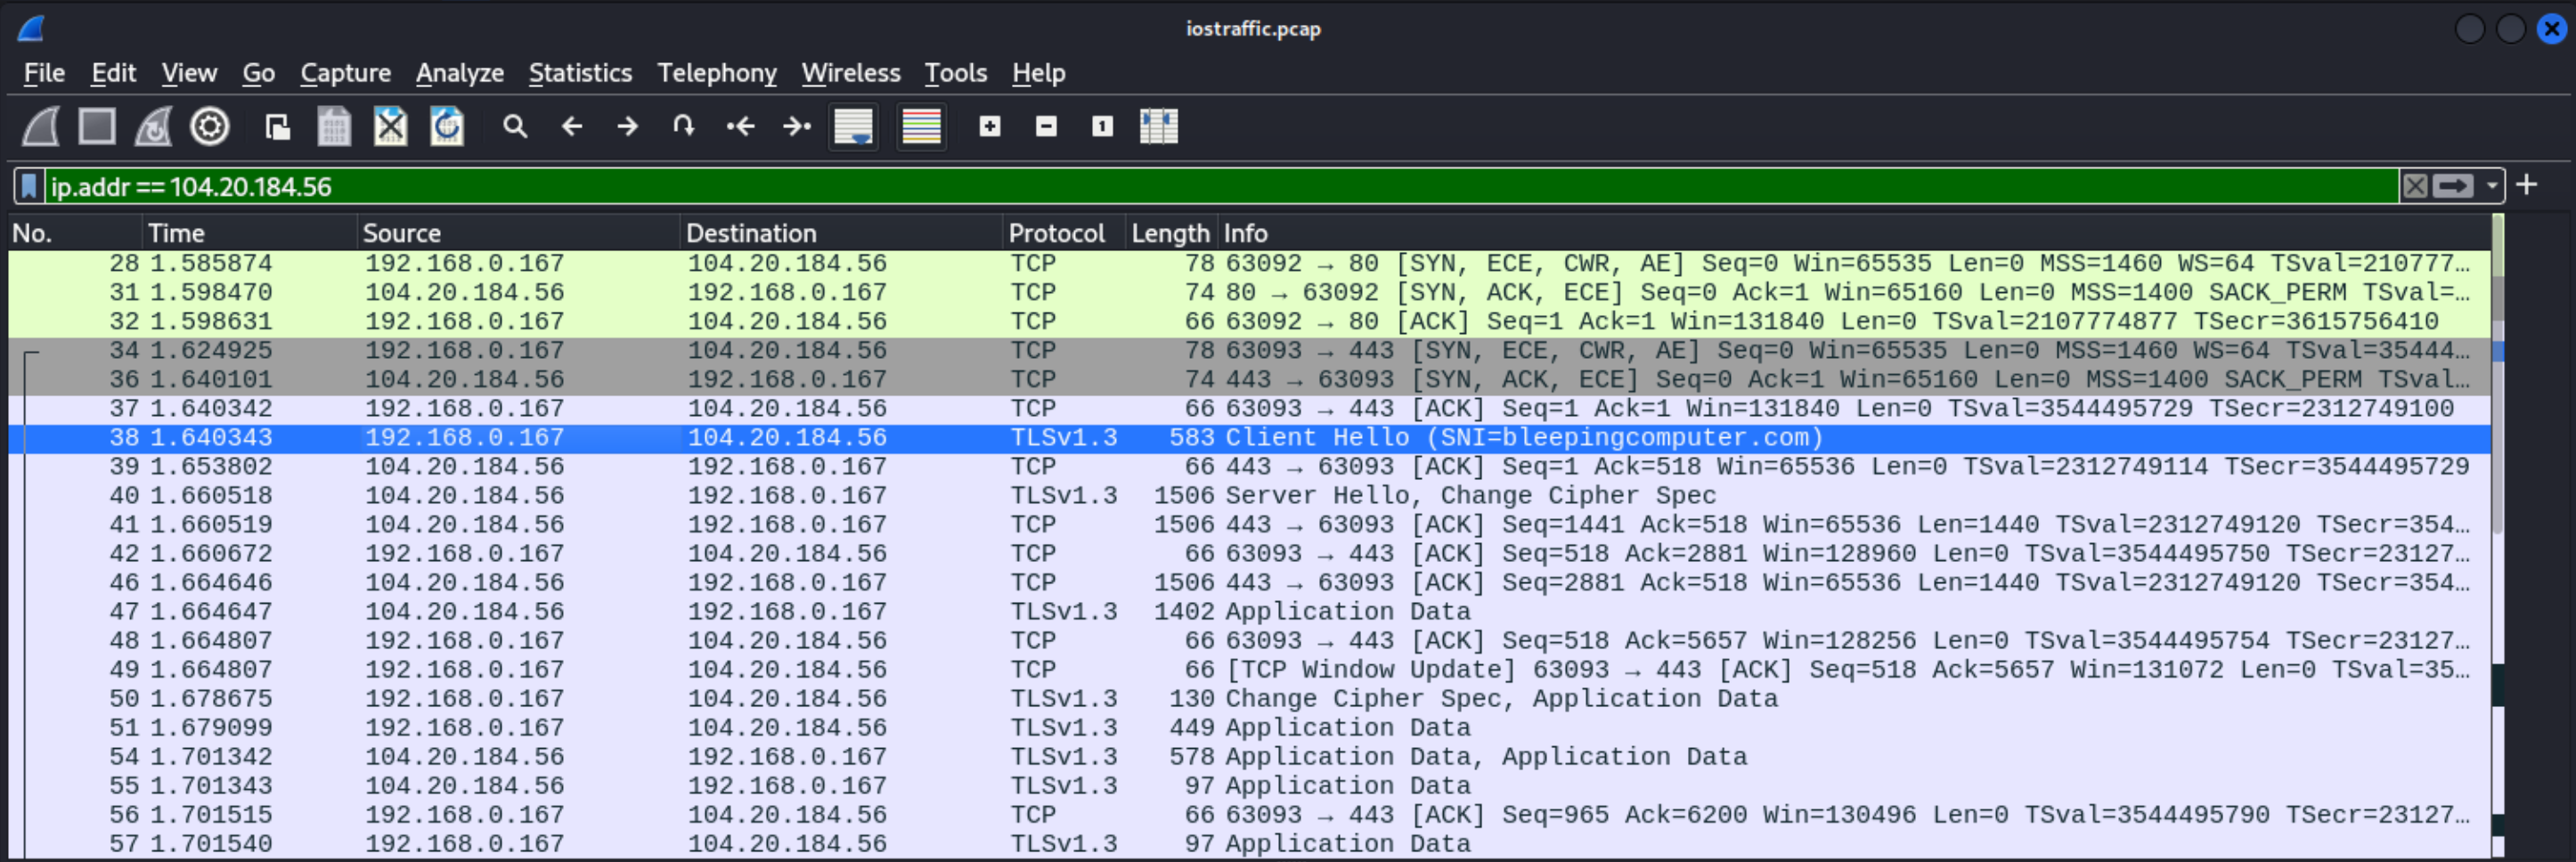
For this showcase, I have captured a web request for bleepingcomputer.com
Analyze the data
The output file can be opened and analyzed with Wireshark. I have applied a filter for the IP address of bleepingcomputer.com (104.20.184.56). The screenshot shows the traffic between my iOS device (192.168.0.167) and the web server. This method also works for analyzing traffic generated by other apps on your iOS device. As you can see, most of the traffic is TLSv1.3 encrypted.
Conclusion
You can capture and analyze network traffic from and to your iOS device with a few simple steps.